
This blog reflects the approach to connect .Net client console application with Microsoft Dataverse. We will first have to create a connection between Dataverse and our console application. The connection process via API which we followed is explained in this blog divided into three sections.
- Creating a basic console application with the required NuGet packages
- Creating client application in Azure Active Directory.
- Linking Azure client application id with the Power Apps.
1. Creating a basic console application with the required NuGet packages
The NuGet packages we use to create 2the connection are Microsoft.Identity.Client and Newtonsoft.Json.Linq

Authentication
The requirement is to authenticate then allow access. We built the connection through a client token generated on providing sensitive information depending on the authentication library used. Since we used ConfidentialClientApplicationBuilder our requirement to generate client token is (client ID, client secret, Redirecturi and Tenantid). How did we get these secret items will be discussed in the later sections. We store the response and later pass it to a built-in method to acquire token. This part covers Authentication.
Client Configuration
We used HTTP Client to send http request which requires base address to hit. This can be found in PowerApps portal > Developer Resources > WebAPI Endpoint.

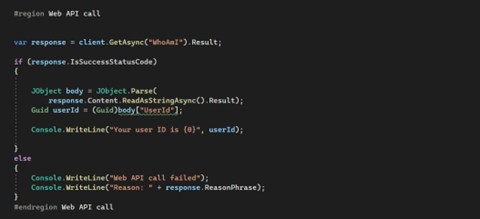
The Web API implements the OData (Open Data Protocol). This is an open data protocol to exchange data over the web. The protocol is HTTP based and has been designed with a RESTFUL mindset meaning you use a URI as a base address and HTTP headers to interact from the endpoint of server. The default Web API Whoami is used to fetch the results.
More information about OData can be found on: OData overview – OData | Microsoft Docs
We use HTTP headers in our code they are used for additional communication between the client and the server with an HTTP request or response. We use HTTP Authorization request header to provide credentials that authenticate a user agent with a server, allowing access to a protected resource. We added a connection check which if the connection is successful returns the User ID of user otherwise returns the reason for failure.

2. Creating client application in Azure Active Directory
Before moving on to create a client application, we first need to understand the need for its creations. The answer is simple, to integrate and grant permissions we create a client application in Azure Active Directory (AAD) and later integrate it with our console application. The AAD App is different from the application in Visual Studio. AAD App generates secret keys representing your access level. You can have many applications in an Active Directory. Each application will have a different access level.
Creating client application facilitates authentication and authorization and you can grant access permissions accordingly.
We can control multiple aspects via AAD like Supporting Account Types, Certificates and Permissions. We can configure platforms, which could be android, web, and many more platforms. In short, we can authenticate and authorize easily for a variety of different client types.
Steps to Create an app
To create a client application, we will have to login Microsoft azure portal. Under services search for App Registrations and create a new registration. The registration page will look like the snapshot below:
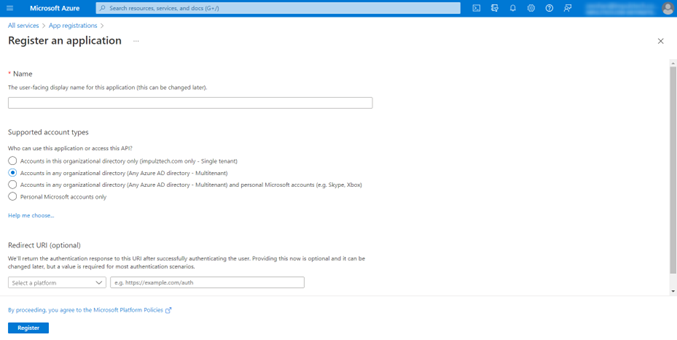
- First give a meaningful name to the application.
- Select which account types to support access. We wanted our app to be accessed in any organizational directory so selected multitenant.
- The Redirect URI can be added here or later. We added a redirect URI *localhost* and let the Uri decide whatever port is available and connects to.
- Redirect URI is the location where a user’s client is redirected and sends the security token after authentication.
- Register
The client application is registered.
Follow the step by step details for registering an app in Azure Active Directory in: Quick start: Register an application with the Microsoft identity platform
Modifications to Integrate with Console App
As we have successfully registered client application in previous section and now, we head to modify some properties in order to integrate our console application with the app just registered.
Integration requires a token and to generate token for client, multiple things are required.
We used ConfidentialClientApplicationBuilder which requires the following parameters to generate a token for authentication (client ID, client secret, Redirecturi and Tenantid).

The client ID shown in the Overview pane is one of the input required by an authentication library used in your application’s code for authentication via token and integration.
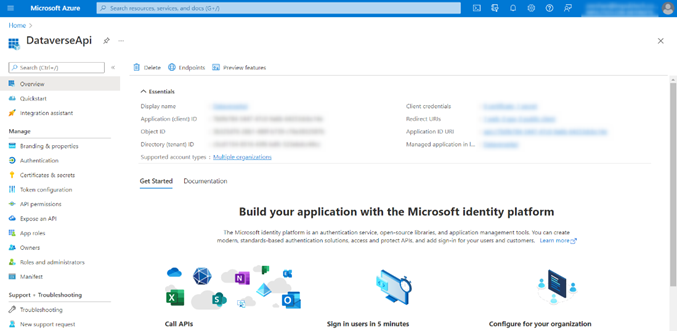
For client secret we will head to Manage > Certificates & Secrets and add a client secret. Please note that Client secret values cannot be viewed, except for immediately after creation. Be sure to save the secret value when created before leaving the page since we will be needing this to generate the token.
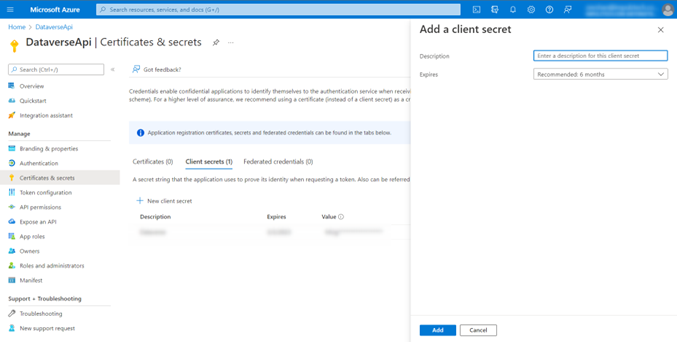
The Redirect URI that was mentioned in Steps to Create an app while Tenantid can be found after logging into PowerApps portal then Settings > Session Details.
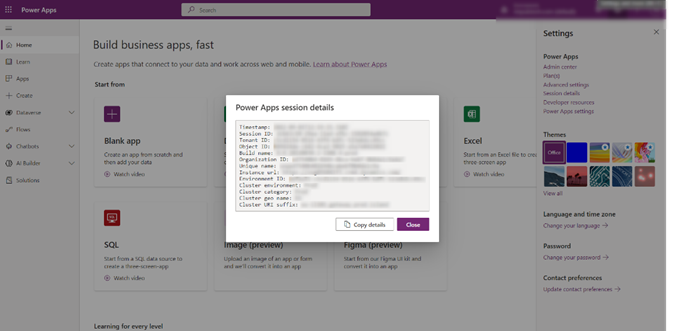
Then switch to Azure portal and head to Manage > Manifest where we can see many properties. Our concern here is allowPublicClient. Set allowPublicClient to true and save.
Lastly in Azure portal, head to Manage > API permissions > Add permission then search for Dynamics CRM and select user_impersonation and add it.
We also granted admin consent for your organization since without admin consent the connection might raise errors.
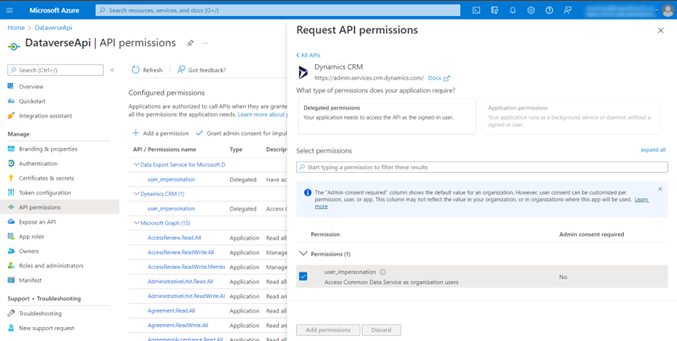
Now all the necessary modifications have been made for our connection to be built and the client application is successfully created and ready to be integrated in code. But before that the connection still requires one last thing otherwise the connection will be forbidden. This is because we have linked Azure application within our console app but it still isn’t aware of PowerApps so we link Azure client application with PowerApps in the next section.
3. Linking Azure client application id with the Power Apps
To link Azure client application just registered with Power Apps, login to Power Apps > Settings > Admin Centre.
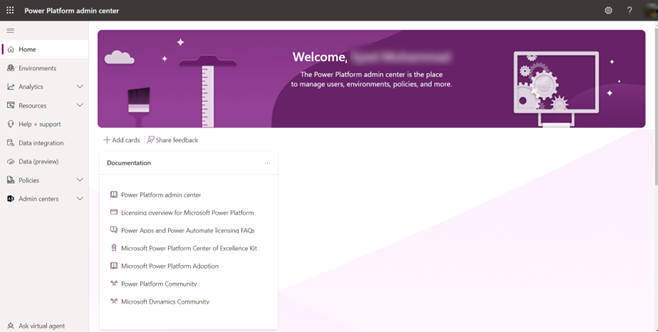
Then head to Environments Section shown on left pane and select the relevant environment and look for Users under Access section.
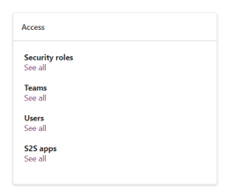
Then open app users list and add a new app user which requires Business Unit (your organization) and define System Admin role for the app and add your registered client application from Add an app.

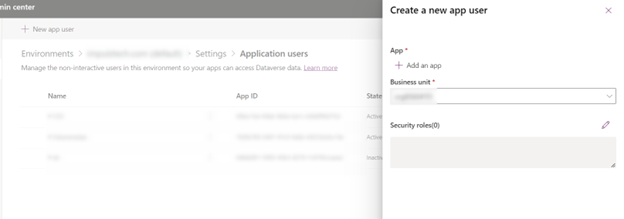
In the end, a notification pops confirming that Power Apps is linked with our client application successfully.
