Transferring software deployable packages to the Asset Library is actively enabled by the connection between DevOps and LCS. Here I am describing each step in detail that how can you setup connection between Azure DevOps & LCS so it will be easy for you to deploy your dynamics packages easily in LCS Environment.
1-Workflow:
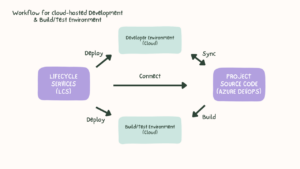
After you configure an Azure DevOps subscription in Microsoft Dynamics Lifecycle Services (LCS), you can use LCS to deploy developer VMs or build/test VMs. LCS configures a developer VM, which can be linked to an Azure DevOps project. Additionally, LCS sets up a build VM, automatically associating it with an Azure DevOps project. This build VM includes a build agent/controller responsible for compiling modules from the Azure DevOps project and executing automated tests through an external validation endpoint. This workflow includes an LCS deployment of a developer VM and a build/test VM in Azure.
- LCS creates developer and the build/test environments in Azure. To create a build/test environment, LCS must be able to determine where the source code for the Azure DevOps project is.
- Developer works on source code on the developer VM, and the work is synced to the Azure DevOps project.
- The build process synchronizes the code from Azure DevOps onto the build/test VM and produces deployable packages that you can apply to sandbox and production environments. The source code doesn’t flow directly from the development VM to the build/test VM. They are synced through Azure DevOps.
1.1-Create a new Azure DevOps project
- Go to https://www.visualstudio.com/.
- Click Sign in in the upper-right corner.
- Sign in by using an AAD account that is in the tenant that your subscription is linked to. If the browser already has your credentials, you won’t see the sign-in page and should instead click your name in the upper-right corner.
- On the right side of the page, under Accounts, click Create a free account now.
- Specify an account URL, and then click Create Account.
- Name your project, and specify a process template. Your project should now be created.
2-LCS project settings: Set up Azure DevOps:

2.1-Create a personal access token
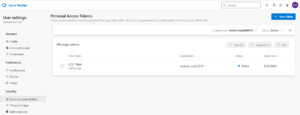

To connect to an Azure DevOps project, LCS is authenticated by using a personal access token. Follow these steps to create a personal access token in Azure DevOps.
- Go to https://www.visualstudio.com, sign in, and find your Azure DevOps project.
- In the upper-right corner, hold the pointer over your name, and then, on the menu that appears, select Security.
- Select Add to create a new personal access token.
- Enter a name for the token, and then specify how long the token should last.
- Select Create Token.
- Copy the token to your clipboard.
2.2-Configure your LCS project to connect to Azure DevOps
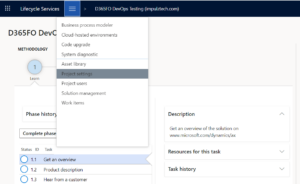

- In this step we see how to setup connection between Azure DevOps & LCS
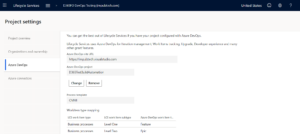
- In your LCS project, select the Project settings tile.
- Select Azure DevOps, and then select Setup Azure DevOps. This configuration is required by many LCS tools. If you’ve already configured LCS to connect to your Azure DevOps project, you can either skip this procedure or select Change to change the existing configuration.
- Enter the root URL for your Azure DevOps account, and the personal access token that you created earlier, and then select Continue.
- Select your Azure DevOps project.
- LCS requires entering the Azure DevOps root URL in the legacy format. The legacy format is and .
- Specify the mapping between LCS/BPM items and the associated Azure DevOps work item types.
- Select Continue, review your changes, and then select Save.
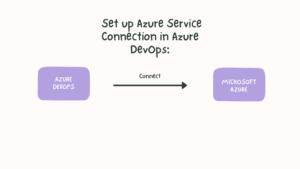
3-Set up Azure Service Connection in Azure DevOps:

3.1-Create an App Registration
- Now create a new “App Registration” under Azure Active Directory with a name like “D365 – DevOps to LCS”
- Under “Supported account Types” please select “Accounts in this organizational directory only (“Your company” only – Single tenant)
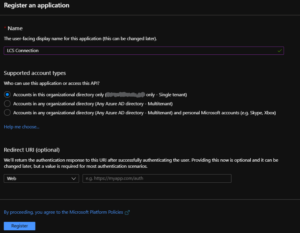

- Now click “Registrer”
- Create an app registration and make a note of the Application (Client) Id.


- Proceed to the ‘Authentication’ section within the app registration.
- Choose ‘Yes’ for the option to ‘Treat the application as a public client.’
- You can adjust this setting before moving on to ‘Add a platform’ if necessary..
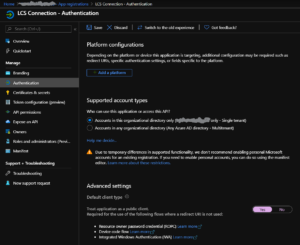

- When you now “Add a platform” select the “Mobile and Desktop application”
- Set a checkmark by the native URL … and click on ‘Configure’
- Now ‘Save’ your “App Registration”
- Now open the “API permissions” and “Add a permission”

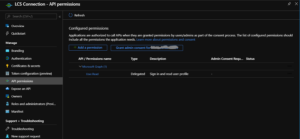
- Click on the tab ‘APIs my organization uses” and search for “Dynamics”, select “Dynamics Lifecycle services”
- Now select “Delegated permissions” make sure the checkmark is set by permissions at “user_impersonation” and click “Add permissions”
- Now click on “Grant admin consent for <Your Company>” and select ‘Yes’
3.2-Create the Service Connection in DevOps
To create a service connection in DevOps it is required that you have installed the extension “Dynamics 365 Finances and Operations tools” (it’s free) into the DevOps, you can find it here:
https://marketplace.visualstudio.com/items?itemName=Dyn365FinOps.dynamics365-finops-tools
Once it is installed you can verify it by going to the Organization settings and in extension column like this
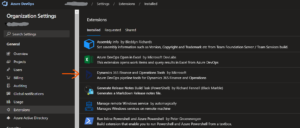

Now open you Project settings in your DevOps and select ‘Service Connections*’


Click ‘ New service connection’ and select “Dynamics Lifecycle Services” and click Next.


and now fill out the Username , Password and the Application Client Id. Click Save and you are done.


4-Set up Azure Connecter in LCS:


4.1-Create a new role in Azure Portal
- On your Azure Portal, go to your Azure Subscription.
- Go to IAM Settings tab, and then click create a new role button.
- Give new role Contributor access.
- For Assign Access to Select Azure Ad user, service principals.
- Then select Dynamics Deployment Services [wsfed-enabled].
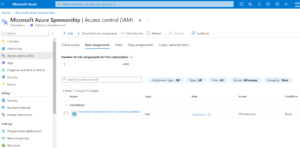

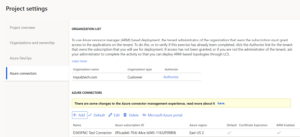
- You can go to LCS and then on Project Settings column select Azure Connector.
- Here you click Add and then simply fill the naming field of your own choice, for Subscription ID you have to add your Active Subscription ID where you had created a role and then select Yes to configure to use ARM.
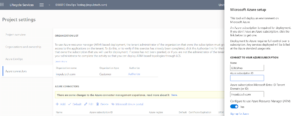

- In the Authorization Page, download the required certification file for authenticating LCS with your Azure Environment.
- Navigate to the ‘Management Certificates’ tab in your Azure Subscription and upload the certificate acquired from LCS, which will serve as the authentication credential. After the successful upload of the certificate, go back to your LCS environment.
- Click ‘Next,’ select your preferred region, and finally, click ‘Connect’ to complete the setup.

In this way we setup connection between Azure DevOps & LCS Environment and setup the pre-requisite of our Build and Development Environment in Azure DevOps.